Spring is in full effect, and since the days are getting longer little by little, some of us may not have to use our lights as often while driving. One thing to check after a winter driving season are your vehicle's exterior lights. Many times, this is a really quick inspection that people forget to do. The ones that we do check often are the brake lights and headlights, but there are a pair of lights which do get ignored: the license plate lights. These tiny bulbs can sometimes be the reason for being pulled over. Follow along as we show you how a mini DIY tutorial on how to replace the license plate bulbs on a Lexus GS300, aka Toyota Aristo for those of our readers in Japan. Remember, that this tutorial is just a reference and we are in no way responsible for any damage you do to your vehicle. If in doubt, consult a professional for assistance.
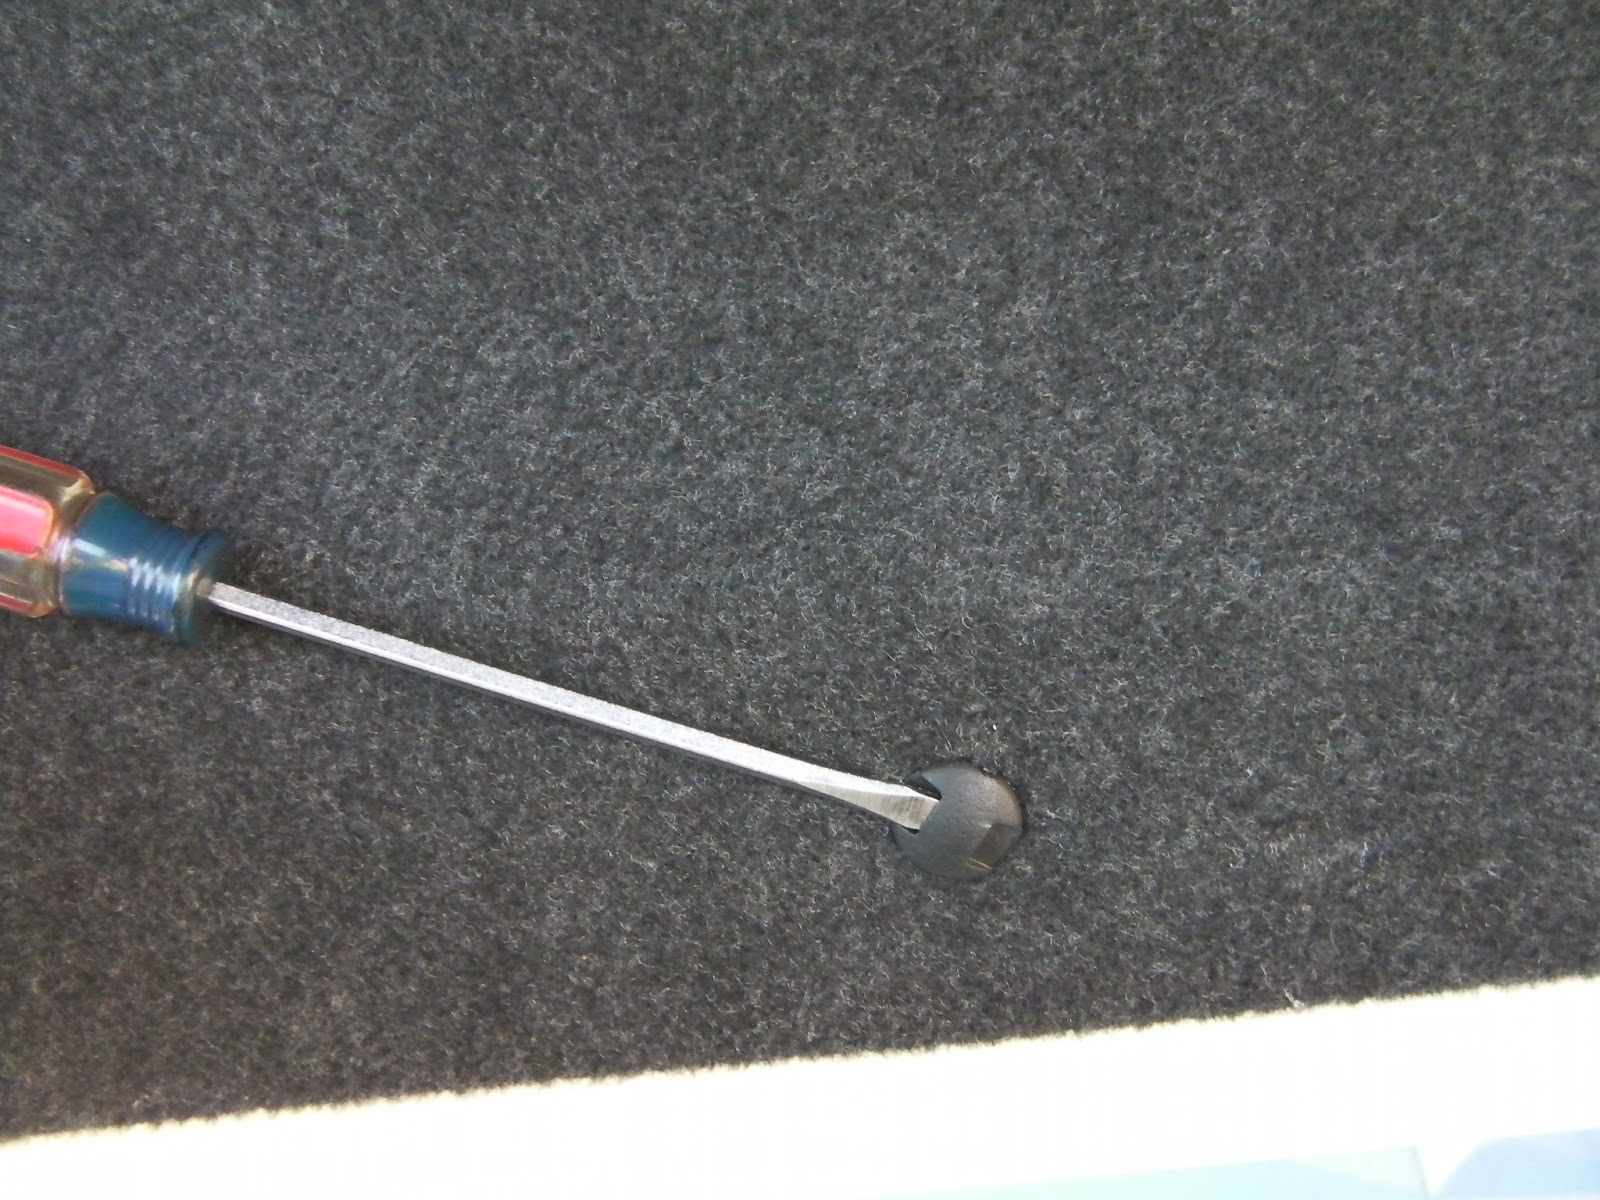
The license plate bulbs are relatively easy to replace, and for the car we did the job on today, we only needed a small flat tip screwdriver. (As a note, there is a special tool you can purchase to remove the trunk clips in a safer manner than with a screwdriver) Start by opening the trunk and locating the round, plastic body clips which attach the trunk liner to the trunk. Using a small flat tip screwdriver, gently pull the clips out of place. You may need to start on one side of the clip and then work the other side in order to remove it.
 |
| Use a small flat tip screwdriver to gently pry the body clips of the trunk liner out. |
There about 12 or 14 clips, just be sure to locate them all. Once all the clips are removed, you can remove the trunk liner off to reveal the license plate bulbs.
 |
| Once the trunk liner is removed, you will be able to see the socket holding the license light. |
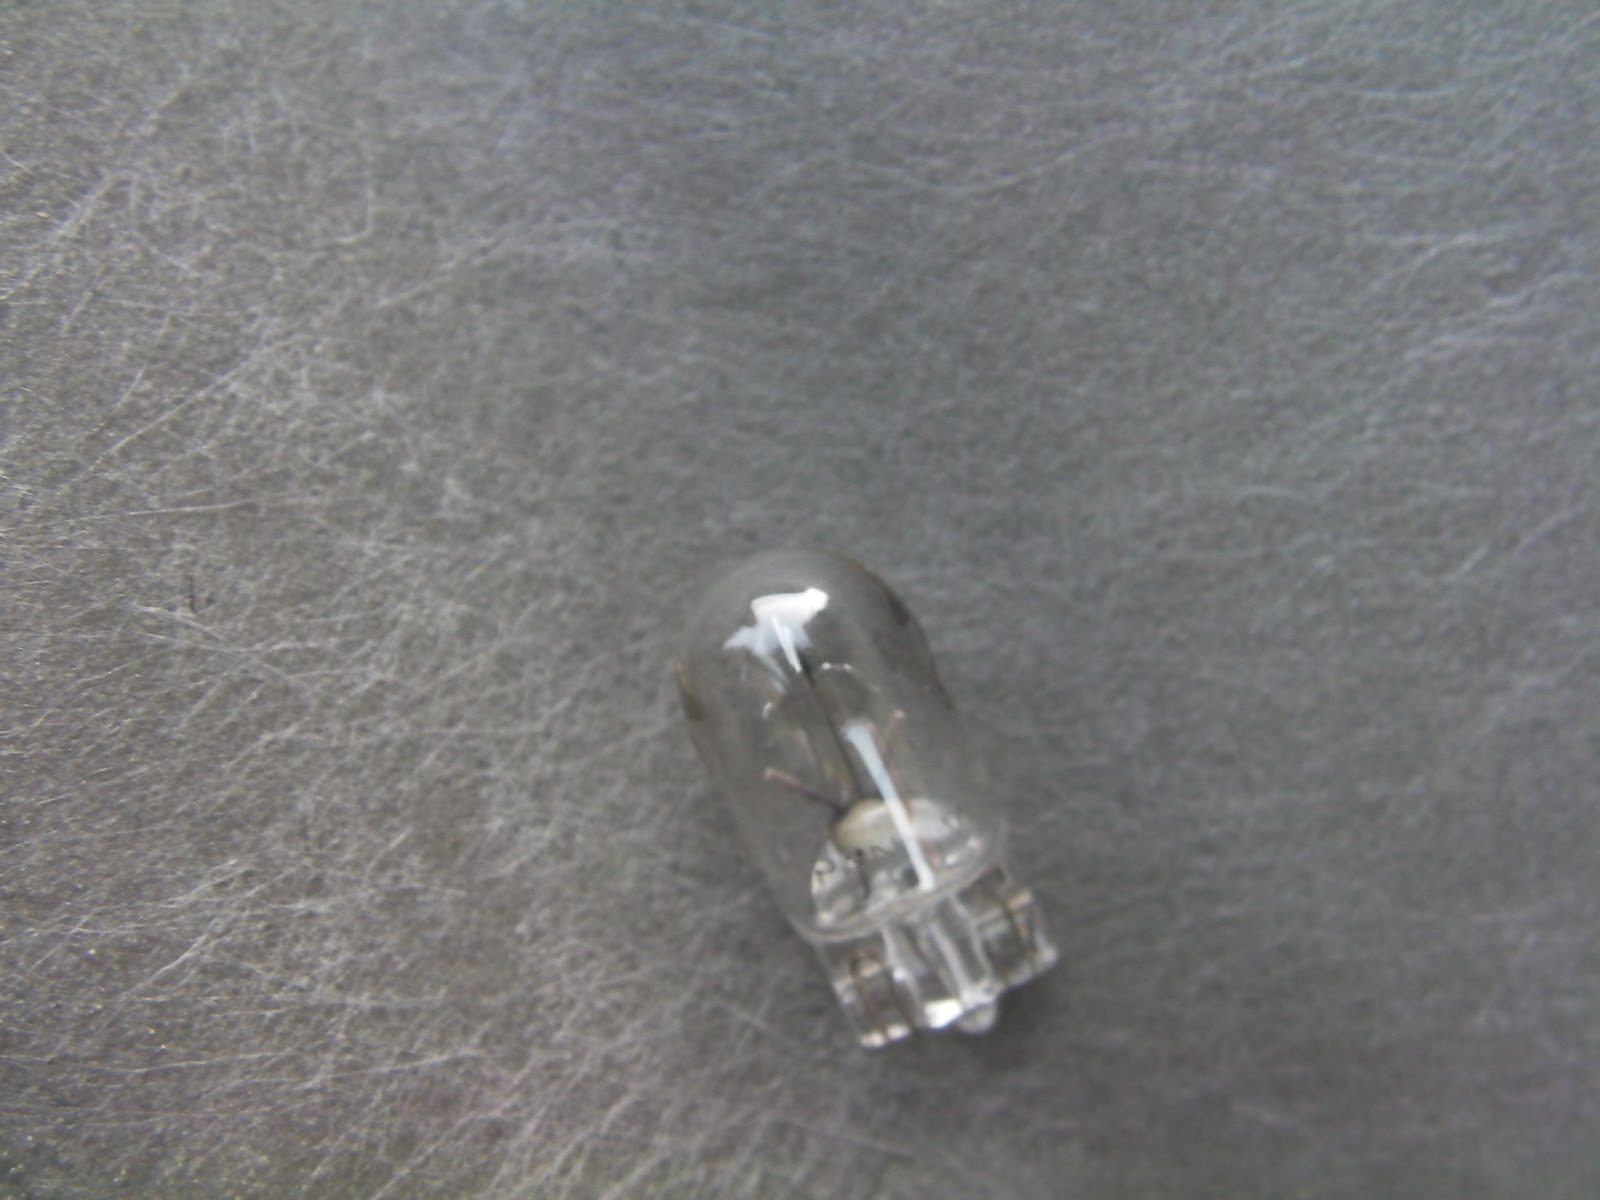
Remove the white electrical clip by squeezing it gently and pulling it loose. Then, rotate the socket counter clockwise to remove it. With the socket out, you can remove and replace the old bulb with a fresh one. We chose to upgrade our lighting with an LED bulb.
 |
| The old bulb removed from the socket. |
With the new bulb in place, turn on the parking lights to test that the lights work. For LED lights, you may have to flip the position of the bulb due to polarity. When you have confirmed the lights work, reinstall the socket back into place.
 |
| Test the new bulb out before putting the socket back in place. |
|
|
 |
| Once you have put the sockets back into place, double check the bulbs on last time before reinstalling the trunk liner. |
Everything else is the reverse of removal. The final product on the vehicle we serviced today looks like this.
 |
| Our test vehicle once again has a well lit license plate. |
The whole process took us about 20 minutes to accomplish while documenting and taking photos. Some cars may vary depending on the location of the lights, but the process is similar.
As always, if you have any questions, drop us a line! Happy motoring and keep on driving!
Here's a link to our article on how to replace a broken headlight lens:
Headlight Lens Removal and Installation


It was a very good post indeed. I thoroughly enjoyed reading it in my lunch time. Will surely come and visit this blog more often. Thanks for sharing. customlicenseplates.info
ReplyDeleteHello there! I just now would like to present substantial thumbs further up towards the wonderful data you have under with this write-up. I am pleased anytime examining your own personal post combined with up to date facts! Cheers spend and also assume you will write-up a lot more web site which are related to this kind of website. 1943 california license plate
ReplyDelete